Section 2.4.1: What is Products / Category / Department / Course
1. Product is item like 'Flat White', 'Cheese Waffle'...
2. Category is a general term for a certain type of product, like 'Coffee', 'Waffle'...
3. Department is the department to cook the item, like 'Bar', 'Kitchen'...
4. Course is a sign of a staged meal...
Section 2.4.2: How to add a product?
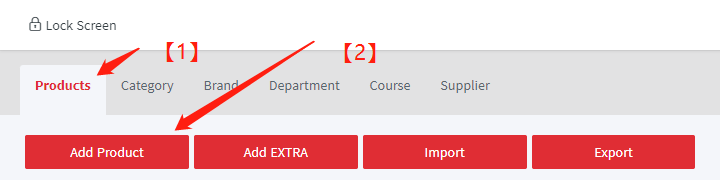
1. In the "Products"...
2. Click the "Add Product" button on the top left,
then you can add a product to the menu.
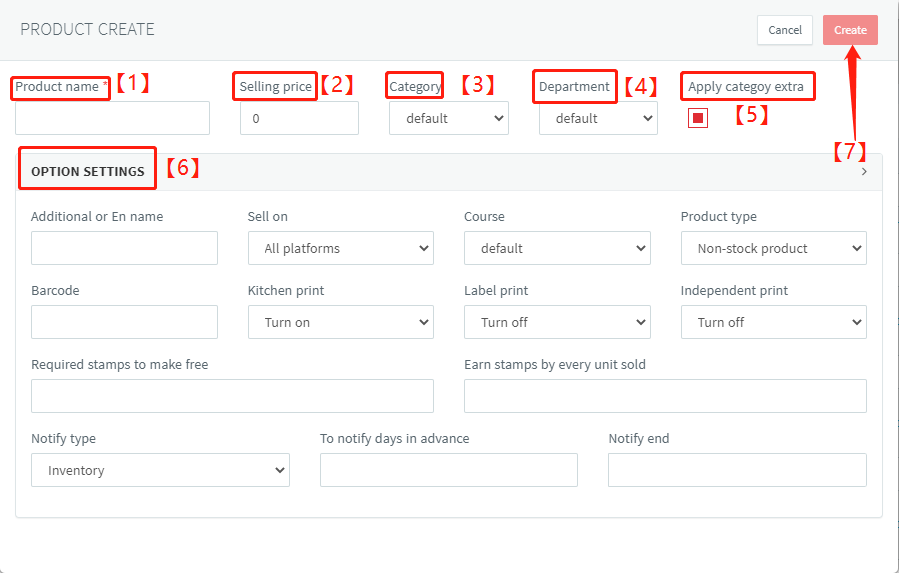
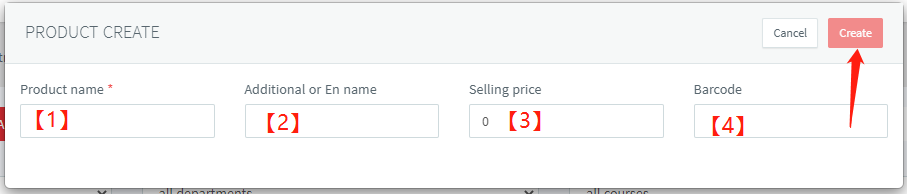
1. Type in product name.
2. Type in selling price.
3. Select a category from the list of available categories.
4. Select a department from the list of available departments.
5. If you click on "apply category extra", all category extras will be applied to the newly added product. Conversely, they will not be applied.
6. There are a number of settings available at the bottom, which you can select directly on request when creating a new product. Or you can modify these settings after the product has been created.
7. When you have finished all, please click on "Create".
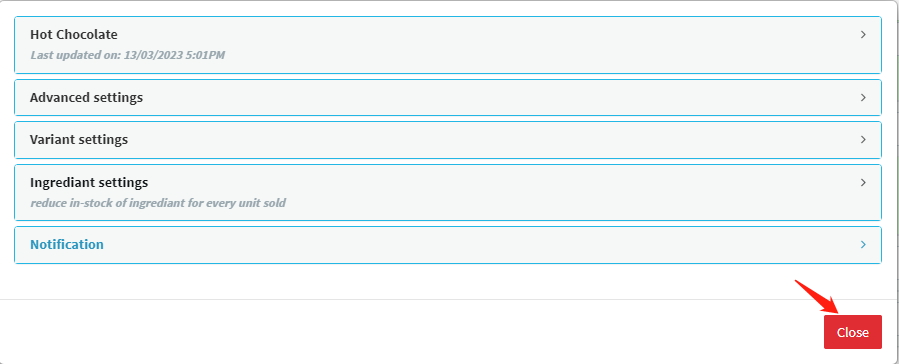
In all subsequent operations, you will need to expand the product settings page first and update it after the changes have been made.
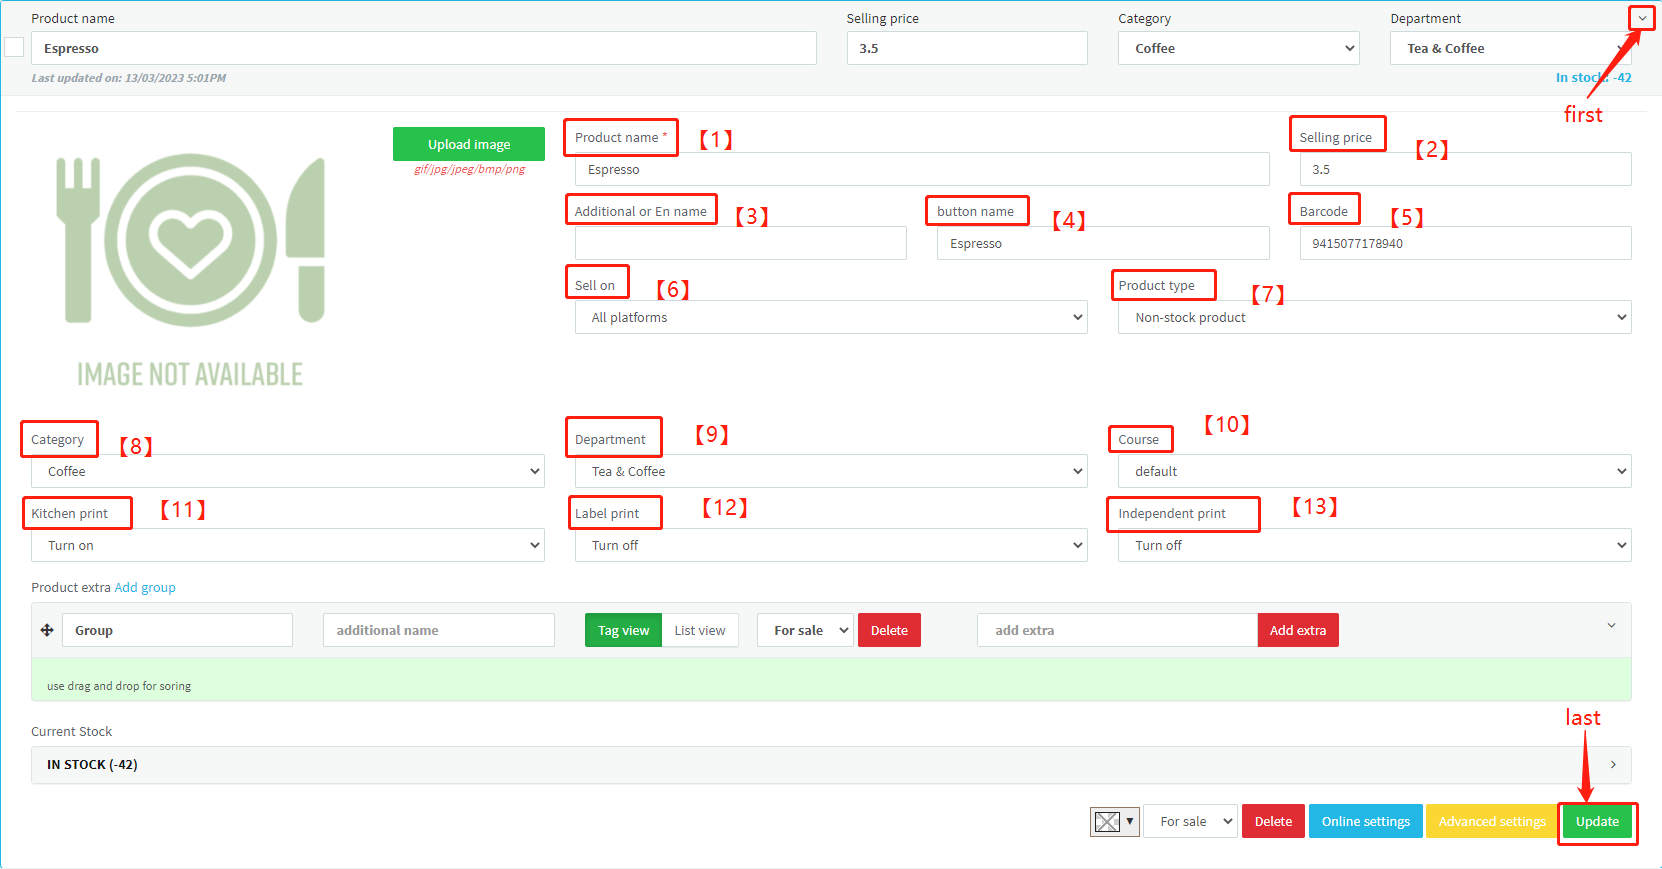
Section 2.4.3: How to change the product name/ price / additional name / button name?
1. Write new name here to change the product name. If the button name is not filled in, the product name will be displayed on the POS system.
2. Write new price here to change the selling price. For products with variant, this column is shown in grey and the price needs to be changed in the advanced settings.
3. Write an additional name to add the additional name. This field is usually filled in with the same content as the product name but in a different language. This field is useful for switching between languages when ordering online.
4. Write a button name to add the button name. The button name is the name displayed on the POS. Sometimes the product name is too long and you need to fill in the button name to ensure that the name is fully displayed in the POS button.
UPDATE CHANGES
Section 2.4.4: How to change / add the barcode / selling platform / product type?
5. Write a barcode to add it. In the retail model, barcode is necessary. It can be added by scanning the code. We can set up automatic barcode generation for you if the customer requires it.
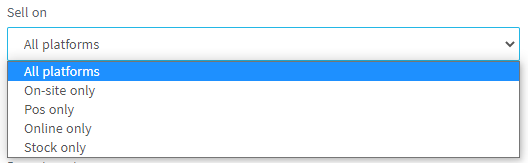
6. Select a type of selling platform here.
'All platforms' means the product can be sold on all platforms.
'On-site only' means the products can be sold on all devices except online store.
'POS only' means the product can be sold by POS machine and tablets.
'Online only' means the product can be sold by online store only.
'Stock only' means the products are only used as stock.
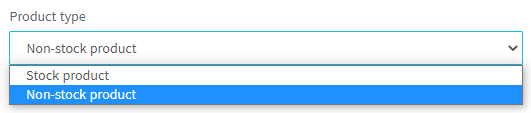
7. Select the product type here.
'Non-stock product':
'Stock product':
UPDATE CHANGES
Section 2.4.5: How to change category / department / Course?
8. Select a new category from here.
9. Select a new department from here. The department is associated with the printer.
10. Select a course from here if you already setup the course list.
UPDATE CHANGES
Section 2.4.6: How change the print settings (kitchen print / Label print / independent print)?
11. Turn on/off the kitchen print here. If you turn off it, the product will only be printed in the GST receipt.
12. Turn on/off the label print here.
13. Turn on/off the independent print here. If you want to print each product individually, you need to turn it on.
UPDATE CHANGES
Section 2.4.7: How to upload an image for product?
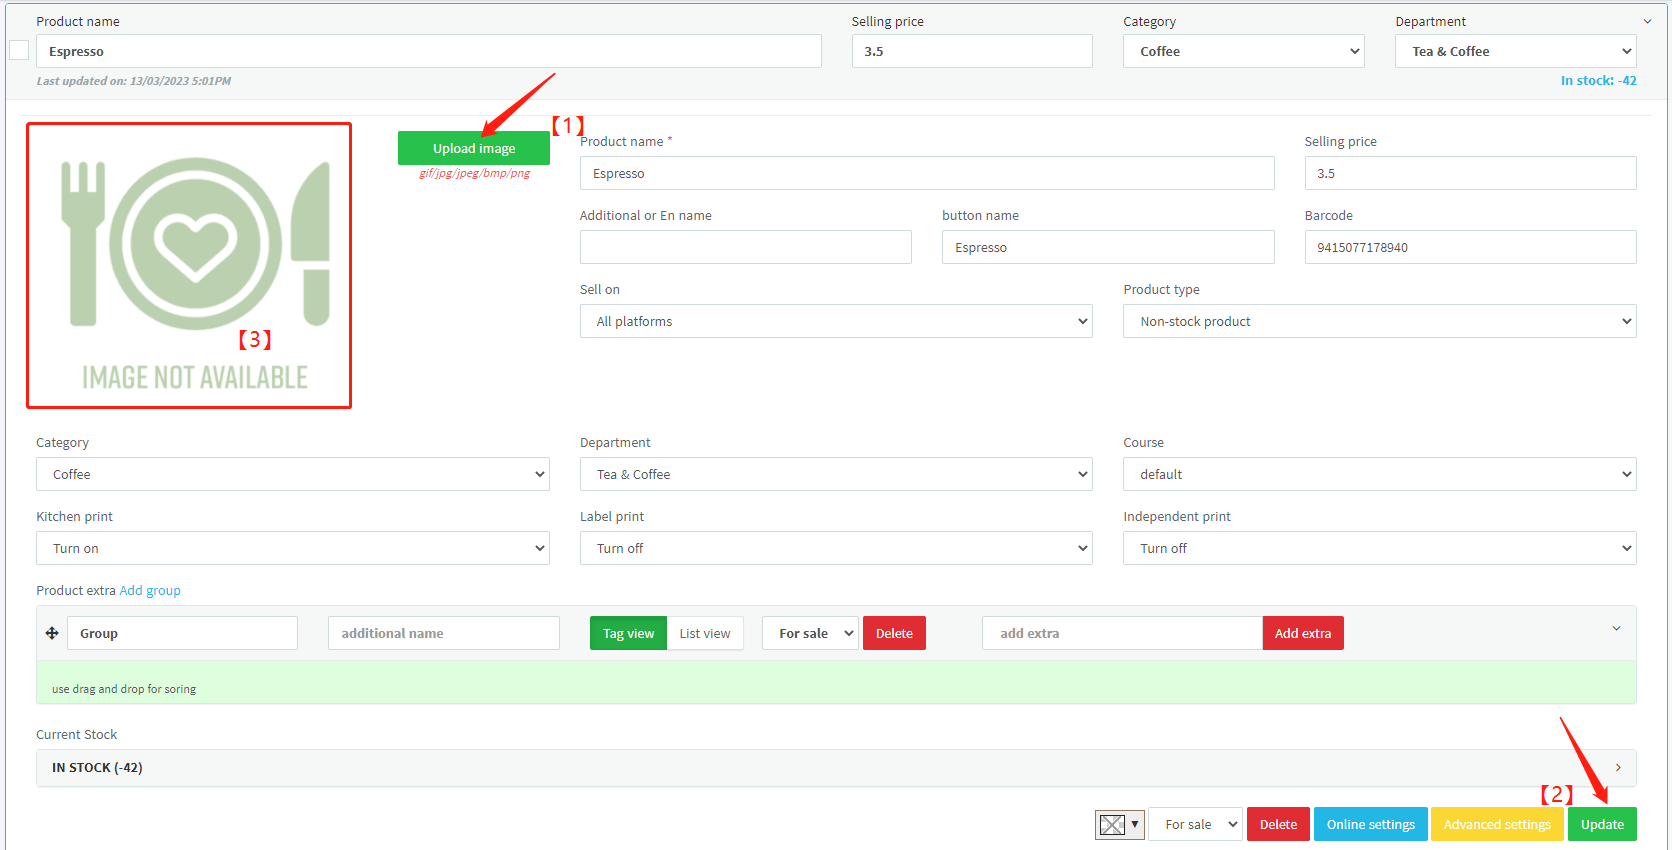
1. Click 'Upload image' to select an image from your computer and jump to a sub-page.
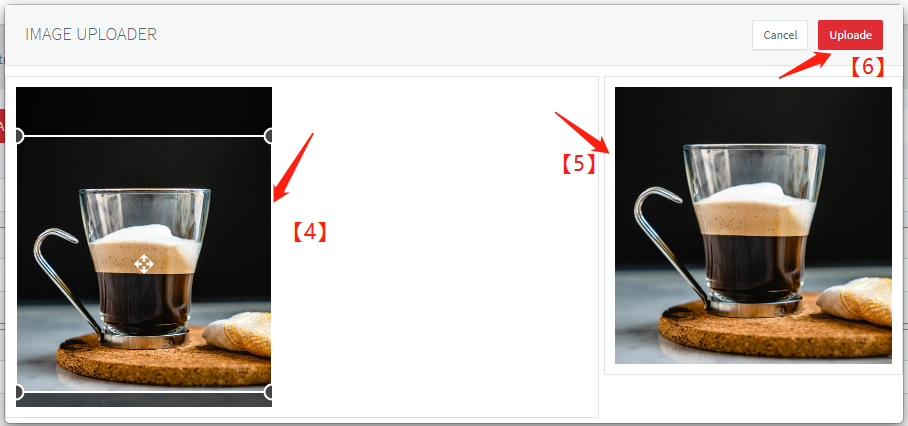
4. The images you have uploaded will be displayed here and you can frame a range of images. Note: This system currently only supports the capture of 1:1 scale images.
5. The intercepted image is shown here.
6. Click 'Upload'
2. If the upload is successful, the image will be displayed here.
3. Update changes.
Section 2.4.8: How to use extra function?
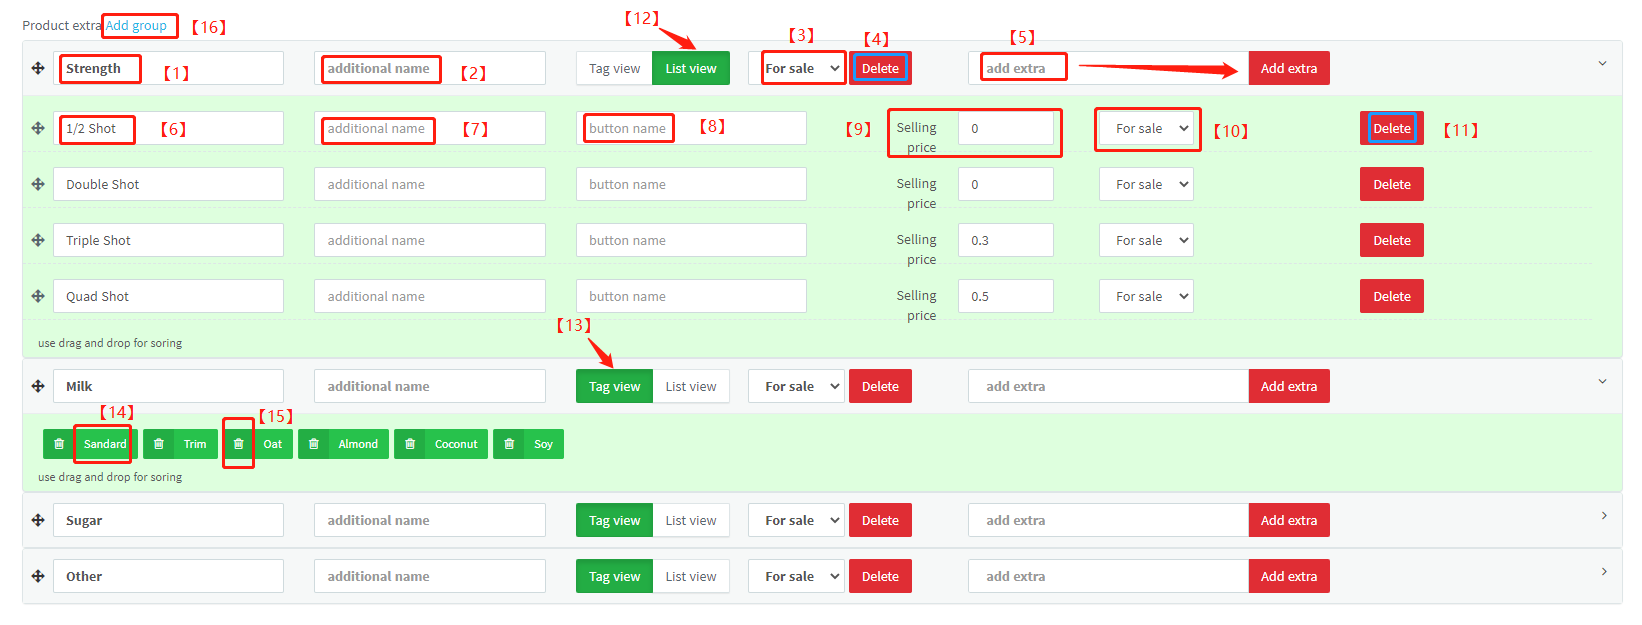
This function is needed when a product has some additional options. You can also categorize the additional options for easy reading.
1. Extra group name write here.
2. Extra group additional name write here.
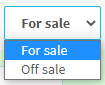
3. You can select this group 'for sale' or 'off sale'.
4. You can delete the whole group extras by clicking this button.
5. Type new extra here and click 'Add extra' button to add the new extra.
6. Change the extra's name here.
7. Change/Add the extra's additional name here.
8. Change/Add the extra's button name here.
9. Type the extra's price here.
10. You can select the extra 'for sale' or 'off sale'.
11. You can delete the extra by clicking this button.
12. 'List View' allows extras to be displayed line by line and expanded in more detail. For example, you can only change and add name and price in list view mode.
13. 'Tag View' allows extras to be displayed tag by tag, merging a lot of detail but clear and easy to read.
14. You can quickly set an extra to 'for sale' or 'off sale' by clicking here.
15. You can quickly delete an extra by clicking here.
UPDATE CHANGES
Section 2.4.9: How to check the stock of a product quickly?
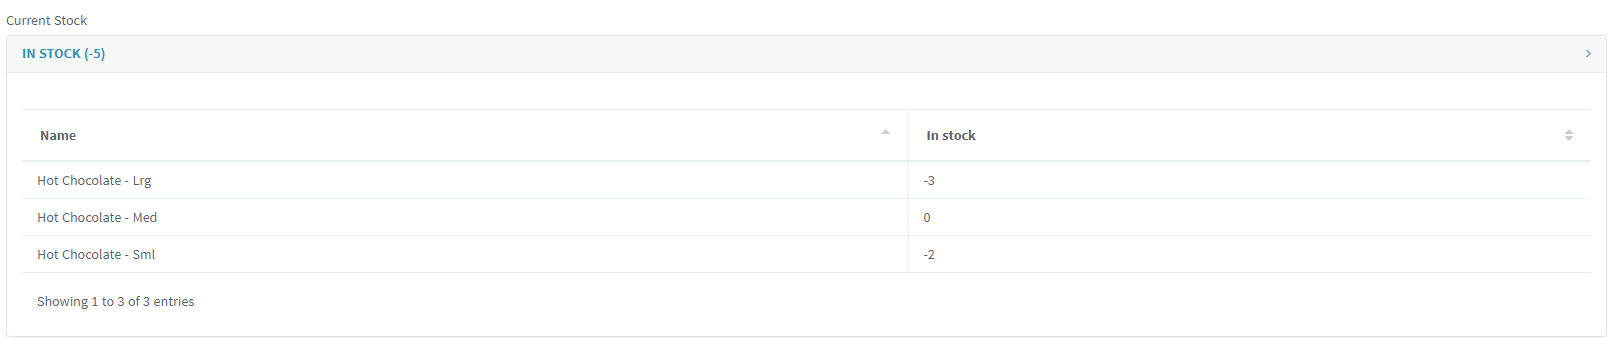
The number after IN STOCK is the remaining stock of this product. If you have not set stock for this product, this number will be negative. Click on the blue IN STOCK to expand the remaining stock of each variant in this product.
Section 2.4.10: How to change the selling status for a product / delete a product / change the product button color?

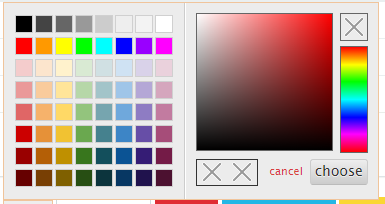
1. You can change the button color here.
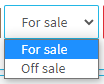
2. You can change the selling status here.
3. you can delete the product by clicking here.

Section 2.4.11: What can you do in the advanced settings?
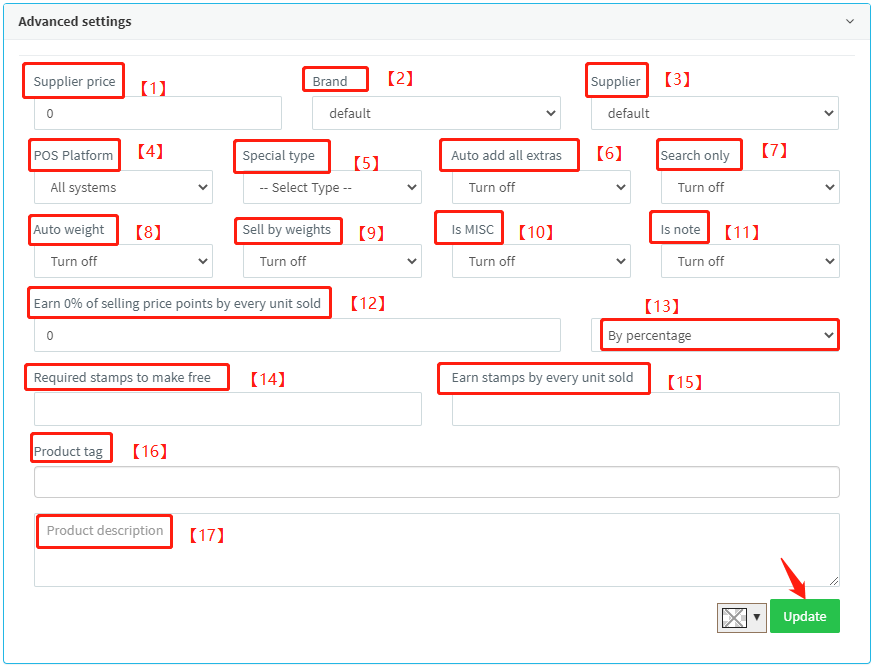
1. Type supplier price here to record.
2. Select a brand here.
3. Select a supplier here.
4. Select a POS platform for the product.
'Standard POS': The product can be sold by POS only.
'Kiosk': The product can be sold by Kiosk only.

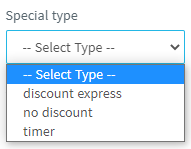
5. Select the special type here.
'discount express': This product can be discount express without restricting staff privileges.
'no discount': This product is not discounted in any case.
'timer': This product is available for price accrual over time.
6. If you turn 'auto add all extras' on, when you add a product, all extras will add to it automatically.
7. 'Search only' means this product can only be found in the client by searching the search box.
'Turn on': This product is not automatically displayed in the client. This situation is generally used in retail shops.
'Turn off': This product is automatically displayed in the client.
8. If you turn it on, the product will be set to weigh automatically.
9. If you turn 'Sell by weights' on, the product will sell by weights.
10. If you turn 'is MISC' on, product prices can be customized.
11. If you turn 'is note' on, product Note messages will pop-up.
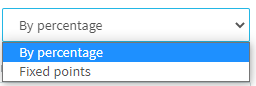
12/13. Set up the store point system, you can choose by percentage or fixed point.
14/15. Set up stamp systems, how many you sold will get 1 stamp and spend how many stamps can get a free items.
16/17. Description
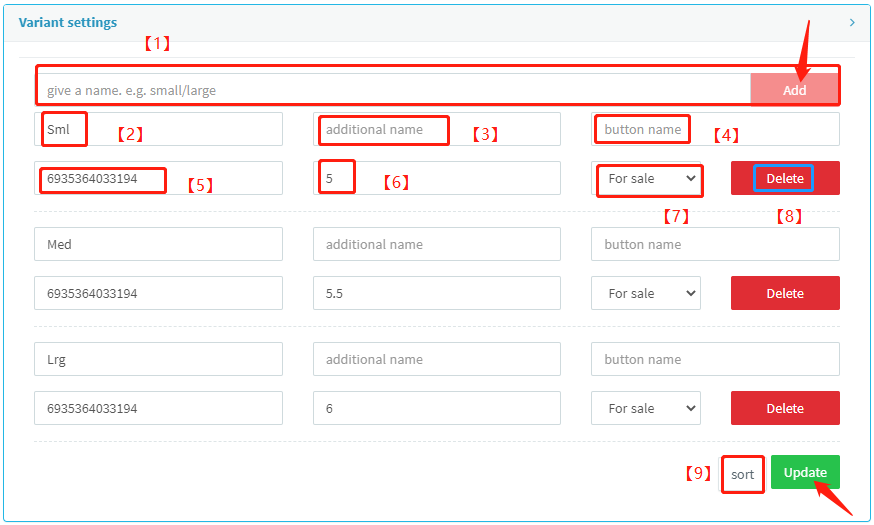
Section 2.4.12: What is Variants settings?
You can set up multiple chooses for customer
1. key in the name and click Add
2. you can change the name here
3. additional name of the product
4. button name showing on the POS
5. Barcode
6. price
7. on sale / off sale
8. Delete the option
9. you can sort the option
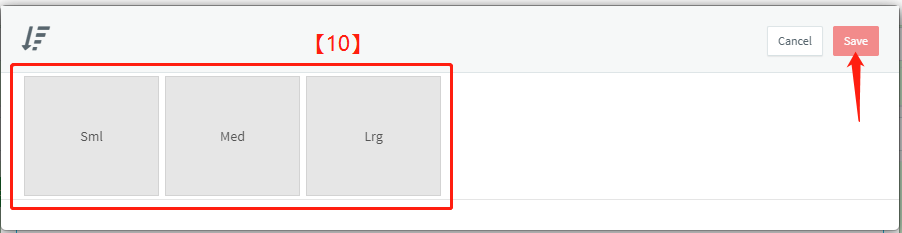
10. drag and drop the option and Save
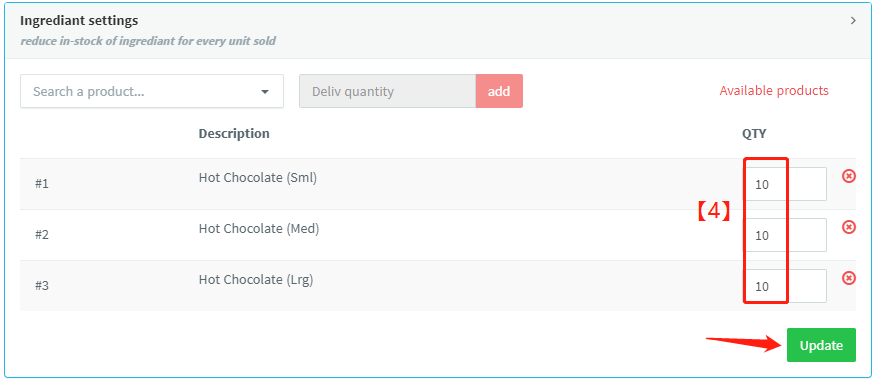
Section 2.4.13: What is Ingredient settings?
1. Select the stock product
2. How much quantity will use will sold one product
3. Click to view available products
4. Change the quantity and Save

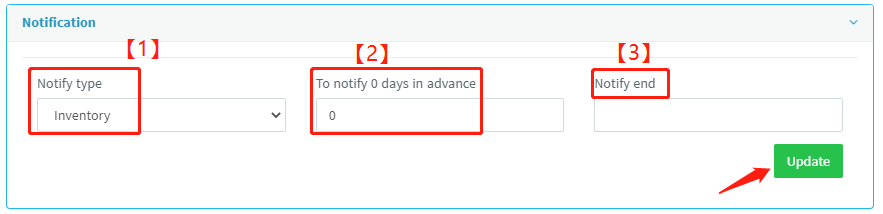
Section 2.4.14: What is Notification settings?
1. Select the product type
2. Notify how many day when the product low stock
3. End date for notification
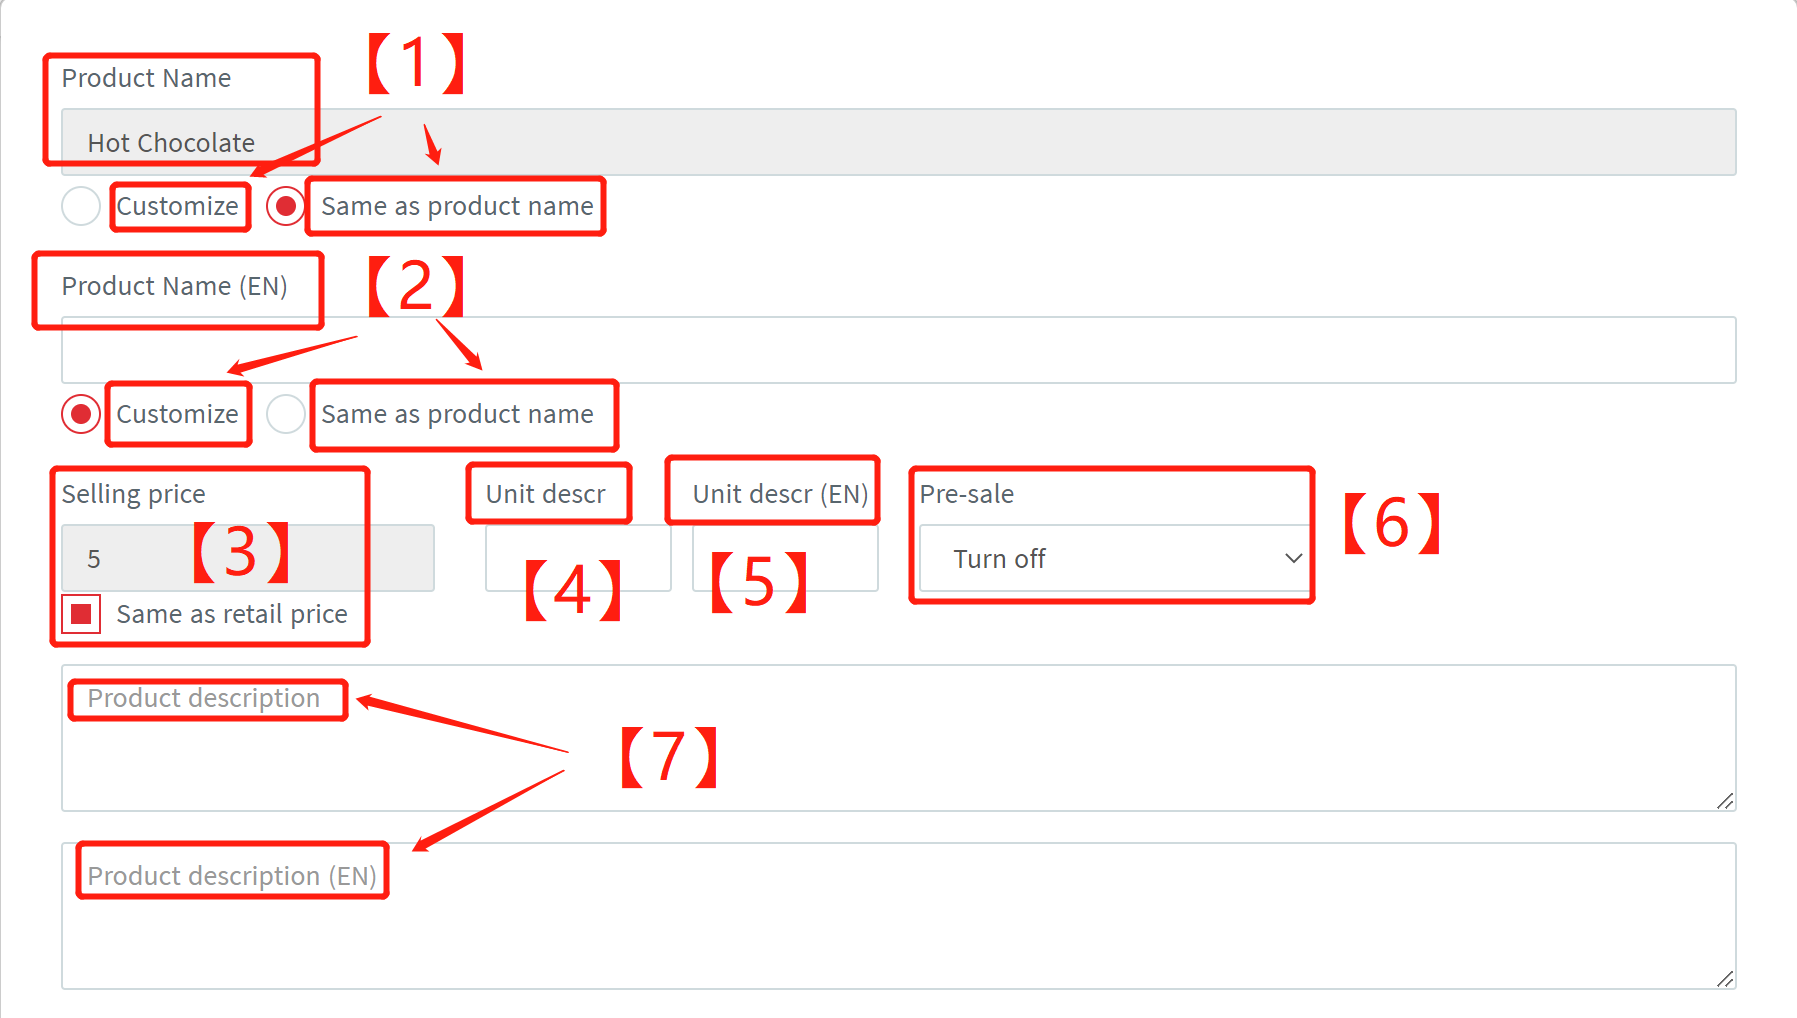
Section 2.4.15: What is Online settings?
Setting showing on online store /table QR Code
1. Product Name
2. English Name
3. Price
4. Unit of the price
5. English name unit of the price
6. Pre-sale set up
7. Description of the product
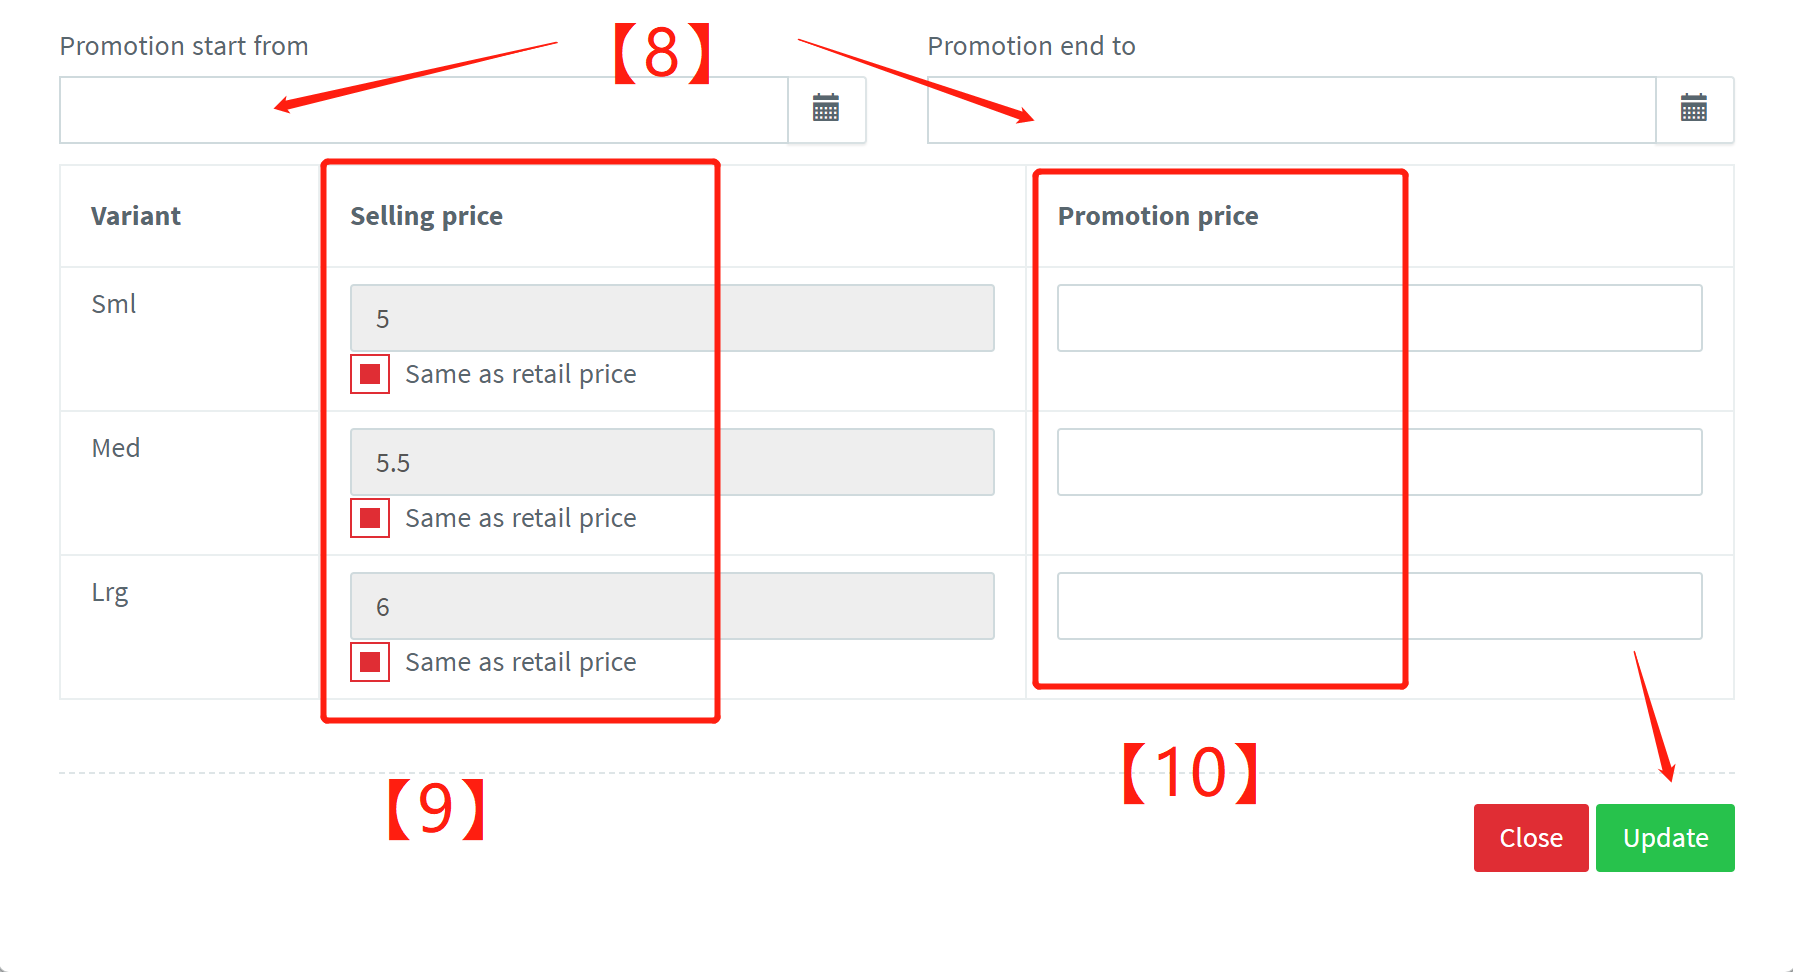
8. Promotion set-up: Date, price
Section 2.4.17: Searching settings

1. key in the name of the product
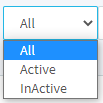
2. Select the product on sale or off sale
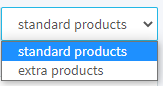
3. Standard product and Extra product(Global Extra, see section 2.4.18)
4. Search by category
5. Search by Department
6. Search by Course
7. Search by Brand
Section 2.4.18: How to add Global Extra settings?
This is the Extra can be apply to all the product
1. Extra name
2. Additional name
3. Price
4. Barcode
5. Create the Extra

Section 2.4.19: Category
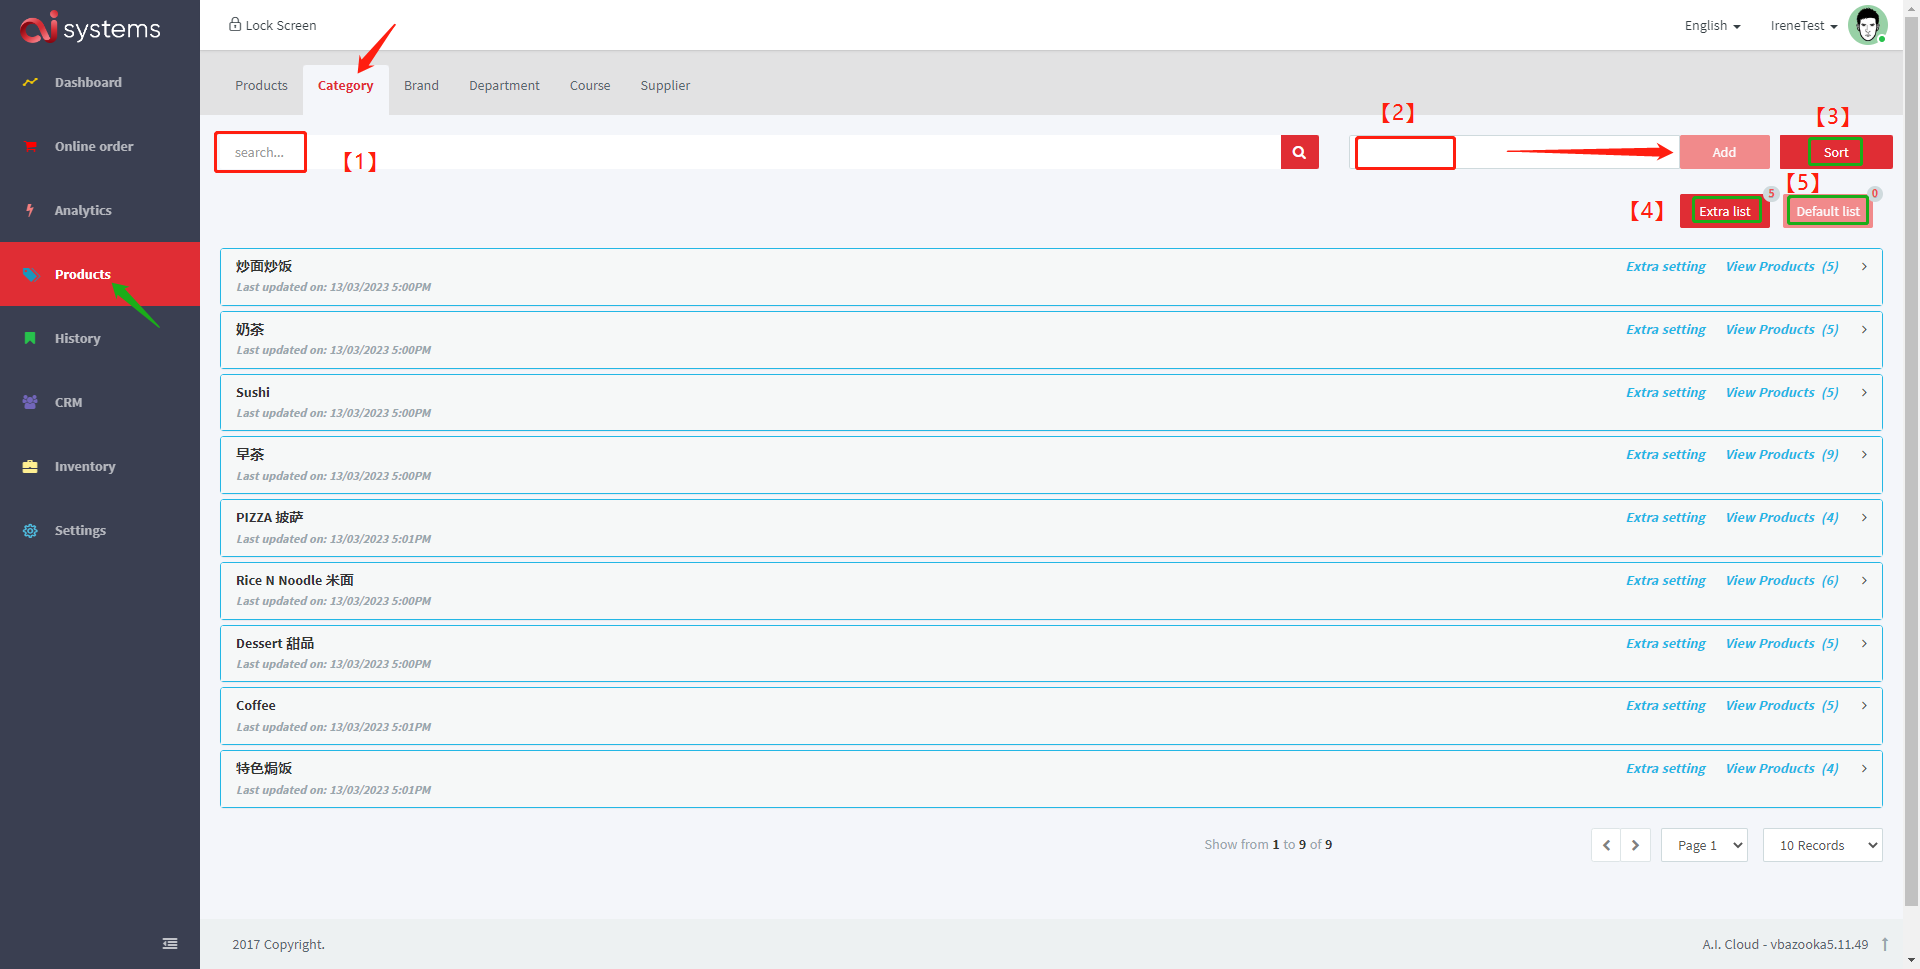
1. Search category
2. key in the new category name and click "Add"
3. Sort the category, drag and drop the item and Click Save

4. Add Extra for all the product in this category
5. Set up the default category
Section 2.4.20: Set up the single category

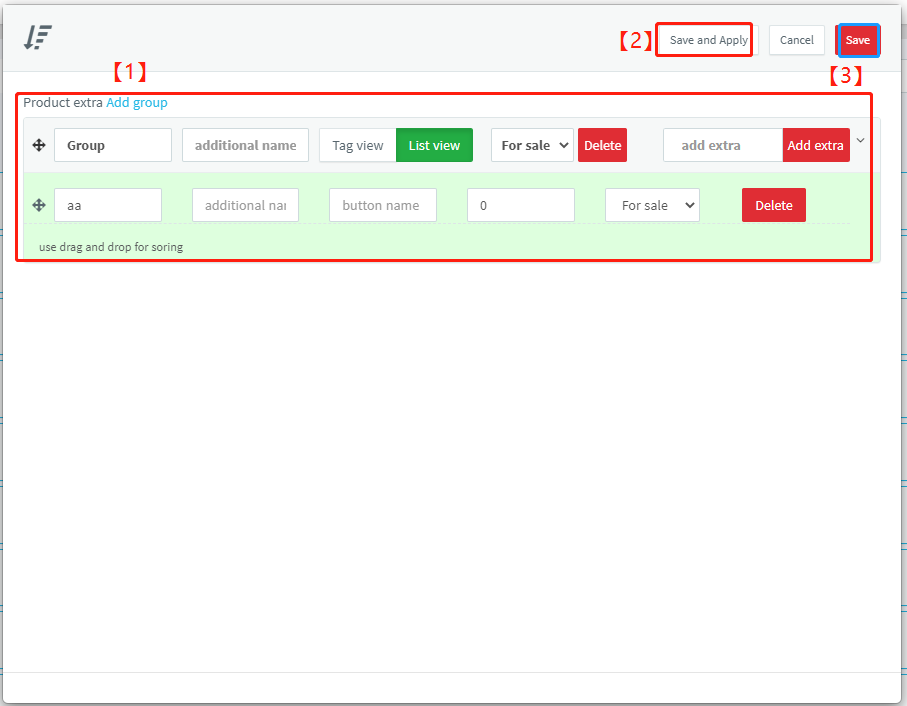
1.1 Extra setting under this category
1.2 Save and apply the extra
1.3 Save only
2. View the product under this category
2.1. Search the item
2.2 Sorting
2.3 darg and drop the item and Click Save

3. Expend the category
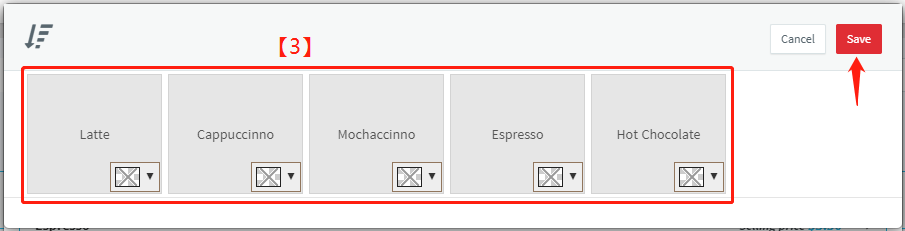
3.1 Upload Photo
3.2 Name of Category
3.3 Additional Name of the category
3.4 on sale platform
3.5 Color set up
3.6 Default this category
3.7 Show/Hide the Category
3.8 On/Off sales
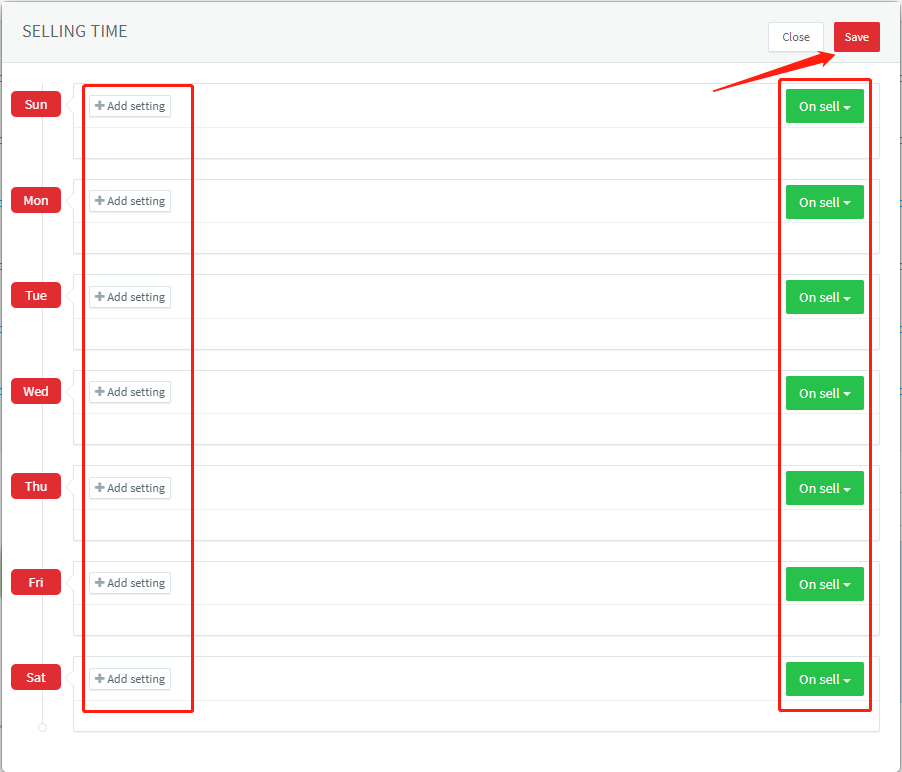
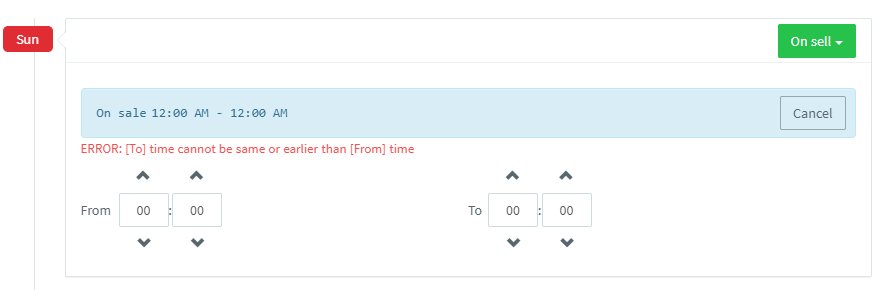
3.9 Set up the selling time as follow